Advanced Defect Detection in Orbital Welding
Welding that’s “good enough” doesn’t cut it nowadays. From biopharma pipelines to aerospace frames, the pressure is on to produce welds that are clean and certifiably flawless. Advanced defect detection in orbital welding blends precision welding with real-time quality assurance.
The growing demand for traceability, automation, and zero-defect tolerances is changing the way orbital welders do their jobs. What does this new reality look like in the field? Let’s start with the screens you’ll be staring at most.
Inside the Interface
Depending on the system, an orbital welder’s control interface can range from basic LCD readouts to full-color touchscreen panels with data overlays, job menus, and real-time analytics. In AMI orbital fusion welding, operators can typically pre-load procedures, tweak settings, and monitor welds live from a user-friendly hub.
During a weld cycle, expect to see parameters such as current, voltage, travel speed, gas flow, and arc time updating in real time. Most interfaces also display warnings for deviations—for instance, a sudden dip in current or a drop in shielding gas pressure. Some systems allow operators to zoom into weld segments, comparing actual versus programmed values.
After the weld, the system stores a complete log, which is downloadable via USB or synced with QA software. In other words, these machines are watching welds happen with you. If you know what to look for in the data, the machinery can help you spot defects.
Detecting Porosity From Data
Porosity is the nemesis of welders. While visual inspection can catch surface bubbles, many pores hide beneath the weld bead, waiting to compromise integrity. Fortunately, advanced weld data offers clues that hint at porosity before it becomes an issue. Look for fluctuations or dips in shielding gas flow rate during the weld cycle. A drop might signal leaks or improper gas coverage, creating conditions ripe for trapped gas pockets.
Additionally, sudden voltage spikes can indicate arc instability caused by contamination or moisture. Temperature inconsistencies, often reflected in current and voltage patterns, can also suggest poor fusion areas where porosity may form.
Spotting Lack of Fusion
Lack of fusion—when weld metal fails to join the base metals—can weaken a joint. Detecting it visually is tricky, but weld data can give you warnings. Watch for low amperage readings or inconsistent current during critical weld phases. If the current doesn’t reach the programmed level or fluctuates wildly, it might mean the arc isn’t penetrating fully.
Similarly, irregular travel speeds can cause the arc to skip or miss spots, creating gaps that lead to fusion defects. Voltage variations during the weld also hint at poor arc stability, another fusion red flag.
Catching Undercut and Burn-Through
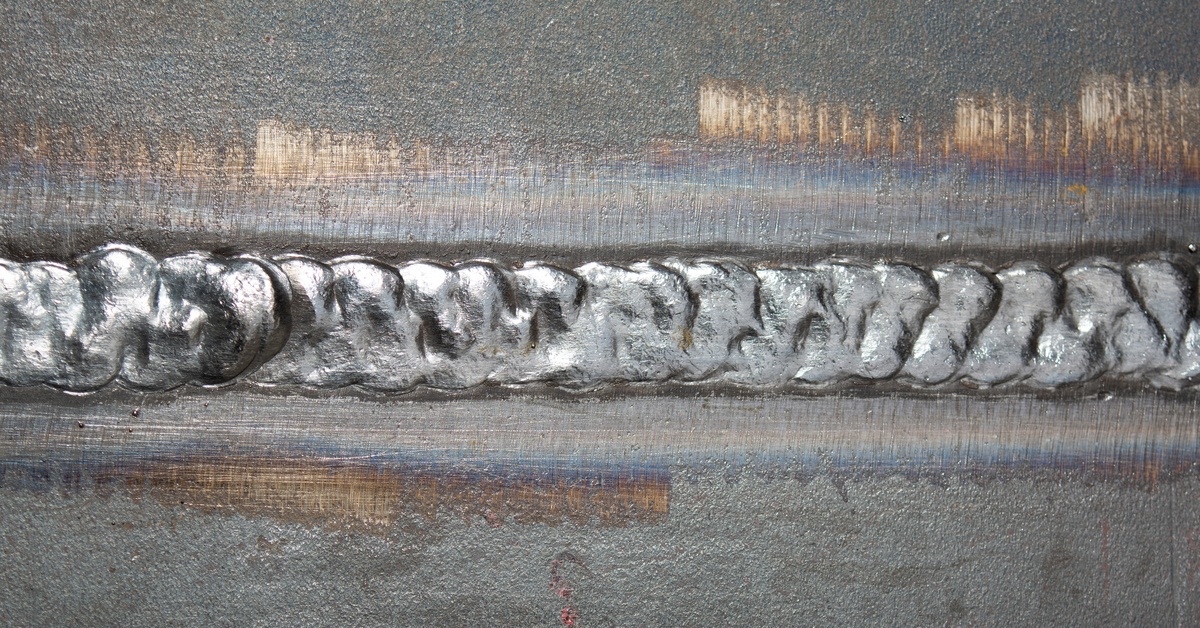
You might be able to spot undercut and burn-through with your eyes, but sometimes they go undetected. Fortunately, the weld data reveals their presence before damage occurs.
Excessive voltage or prolonged high heat input readings can be early indicators of burn-through—when the weld melts through the base material, creating weak spots or holes. Likewise, undercut often shows up as rapid voltage fluctuations or spikes, especially near the start or end of the weld pass, where control is more complicated.
Consistent travel speed is critical here; sudden speed changes may cause the arc to dig into the edges.
Identifying Arc Instability or Dropouts
Arc instability can feel like wrestling an unruly beast; voltage and current spike unpredictably, and the weld quality takes a hit. Look for sudden voltage spikes or dips on the interface; these are signs of arc dropouts or inconsistent electrode contact.
Waveform irregularities, such as jagged or erratic graphs, also suggest the arc isn’t steady. Causes range from worn consumables to contaminated surfaces or machine glitches. Whatever the reason, these fluctuations can lead to poor penetration, porosity, or incomplete fusion.
With advanced systems, alarms can alert you instantly to these problems, allowing you to pause the weld and troubleshoot before proceeding. Mastering this data keeps your welds consistent and your reputation intact.
Tackling Excess Spatter and Surface Irregularities
Spatter and surface irregularities might seem like minor annoyances, but they can indicate underlying issues affecting weld quality. Excessive spatter points to improper current settings or contaminated surfaces, both of which show up in the data as current or voltage fluctuations.
A sudden rise in current beyond programmed levels can cause molten droplets to fly off the weld pool. Surface irregularities, such as uneven bead appearance, can correspond with inconsistent travel speed or unstable arc conditions.
Addressing Cracking Risks From Thermal Cycling
Cracking—whether hot or cold—can ruin a weld’s integrity and service life. Data related to heat input, cooling rates, and weld sequence can be your best defense.
Excessive or uneven heat input, common in prolonged high current or voltage readings, increases residual stresses that cause hot cracking. Meanwhile, rapid cooling might lead to cold cracking, often linked with weld sequencing and interpass temperature control.
Recognizing Incomplete Penetration
Incomplete penetration can result from incorrect heat input or poor joint preparation, but data doesn’t lie. If the amperage readings fall short of what’s needed for the material thickness, or the travel speed is too high to allow full fusion, the numbers will show it.
You might also spot a mismatch between programmed and actual arc time, suggesting the arc wasn’t maintained long enough to achieve full penetration. These patterns can be subtle, but over time, they reveal which passes consistently fail to deliver the needed depth.
Diagnosing Gas Coverage Issues
Problems with shielding gas don’t always scream for attention until porosity, oxidation, or arc instability sets in. If you’re watching the gas flow data, the warnings are noticeable.
Drops or irregularities in flow rate during critical segments of the weld can suggest a kinked line, an empty bottle, or a bad connection. Some systems allow real-time gas flow monitoring; if yours does, keep it close. If you see consistent drops at the same point in the weld, that’s a pattern. The data helps you distinguish a one-off error from a recurring equipment or setup problem.
Uncovering Mechanical System Errors
Sometimes, the issue isn’t the weld technique; it’s the gear. Advanced orbital systems often include diagnostics that log mechanical issues, such as head stalling, misaligned clamps, or inconsistent wire feed (if you use filler). These events show up as unexplained pauses, motor errors, or abnormal shifts in speed or current.
Knowing what a normal cycle looks like helps welders and techs identify when a piece of equipment is drifting out of spec.
Where Precision Meets Prevention
At this point, it’s clear that advanced defect detection in orbital welding can be the difference between a perfect pass and a total failure. If you’re ready to equip your team with the tools to weld smarter, not harder, SEC Industrial has you covered. We offer top-tier equipment designed for accuracy, consistency, and industry compliance.
